The idea
You already hear more than you can play. That gap is the whole problem, and it closes from one end only.
A common read Greg gives after hearing a student's own record is that they are more of a composer than a player. That is a compliment and a diagnosis at the same time. The ideas arrive faster than your hands can execute them, so the ideas get simplified down to what your hands can do, and the music comes out sounding like the same thing over and over. Scales are how you stop paying that tax.
This is not a warm-up you get through on the way to the real work. Every major scale, hands together, evenly, at a tempo slow enough to think, is a specific physical capacity that takes months to build and stays with you for decades. Greg built his at 40 BPM in college, having barely been able to play scales at all before that.
The range he prescribes is two octaves. His words: "I want you to be able to just do a full two octaves," and then the key order, "you'll just do all those in two octaves." Two octaves is the requirement because two octaves already contains every crossing the fingering has, in both directions, in both hands. Four octaves is the extension, and it opens one key at a time as that key gets clean at two. Greg's own beginning is the reason four is worth reaching for eventually rather than immediately: "when I was just first starting, I did super slow from the bottom of the keyboard to the top of the keyboard and every key." Get the two first.
One line to hold onto for two weeks: do it slow enough that you can think about exactly what you are doing.
Watch
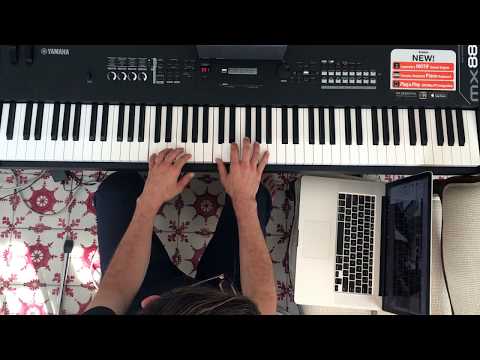
Basic Piano Lesson #1: Major scales and triads
- [11:14] Elbows a little forward, because straight back is not a natural pose. Then the wrist. A wrist bent up is the common fault, and "that causes abnormal tension because then you're like pressing with your with your fingers in a weird way" [11:27]. Wiggle the wrists out, let them fall, and keep the hand low and relaxed.
- [14:00] The contrary-motion idea. You are lifting one finger and pressing another at the same time, using almost no muscle, hand low and level with the key bed.
- [15:58] The kung fu image for the same thing. Throw a punch with the right hand and bring the left hand back, and it is "the contrary motion that allows for the most force with the least effort." This is the touch you will spend A2 on.
- [20:50] The assignment as Greg first gave it. All the scales down perfectly at 40 beats per minute, with the technique he had just corrected, "because you have to start from the ground up with correct technique or else you damage your hands eventually." He demonstrates two octaves, which is also the range he assigns in lessons, because two octaves already forces every under-the-thumb transfer in both directions.
- [21:49] The rule in one sentence. Put the thumb on the white key when you are crossing over from black keys, and he adds that the thumb lands to one side of every black key, because that is what makes the scale most efficient.
Fingerings for Major Scales
- [00:39] C major right hand. Start 1-2-3, then thumb under, and cross again at C, so the crossing points are F and C. Coming back down, use the pinky, then the third finger over after F, then the fourth, then the third again.
- [01:23] C major left hand. Go up the whole hand, 5-4-3-2-1 landing the thumb on G, then the third finger over onto A, 2 on B, 1 on C, then the fourth finger over onto D and the third onto the A above it. Greg's observation at [01:35] is the one to keep: "it's symmetrical going up in your left hand as it is going down in your right hand."
- [03:18] The governing principle, stated on C sharp. Cross the thumb under whenever you are going from a black note to a white note. Descending, at [03:59], cross over whenever you are going up to a black key.
- [02:18] His pacing warning, which is the honest one. It took him a long time to learn these, so go very slowly at first until you get it perfectly, with perfect fingering, and totally relaxed.

Piano scales fingerings and Piano Fingerings for Scales
- The first is an announcement rather than a lesson. Greg's student Dan built a fingering chart for the scales lesson, Greg posted it as a Word file and a PDF in the description, and he asked viewers to send corrections. Print it and keep it on the music desk.
- In the second, Greg runs the fingerings for every mode of every key, two octaves plus one note, and says it is something he is determined to do for himself every day.
- He is candid in it. He flubs scales, says "I got to slow down" because "I'm trying to talk at the same time," and says outright that he is using pretty bad finger technique in the video because he is working on his lift. Watch it for the map, not for the model performance.
- The disclaimer that matters. These fingerings are not from any book he knows of, "but this is the most efficient fingering for any scale." The chart below agrees with the standard published fingerings in all twelve major keys, so you get both.
How to play all modes on the piano
- [13:01] Watch him fix a student's left hand in A major in real time. Skip the rest of the video for now; the modes belong to A4.
- [15:01] The correction itself. The thumb was in the wrong place, "because you're moving to a black note upwards after that," so the fix is the fourth finger crossing over after the E.
- [16:34] The reasoning behind it, which is the part you keep: "any time that you want to go upwards to a black note from a white note it makes sense to cross over." He says plainly that other techniques exist and this is the one that makes the most sense to him.
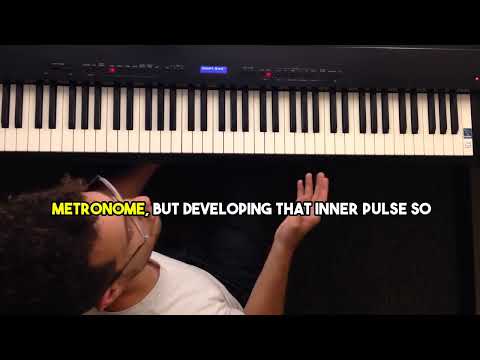
USE A METRONOME! and Practicing SLOW!!!
- [00:05] Feel the time along with the metronome, do not rely on it. Develop the inner pulse, because time is the thing everything else sits on.
- [00:05] Greg's own numbers. Metronome at 40, scales in quarter notes, until he had it perfect with the form and everything relaxed, and only then sped it up. His line at [00:33]: "that's how you're going to get good at this not by rushing through it."
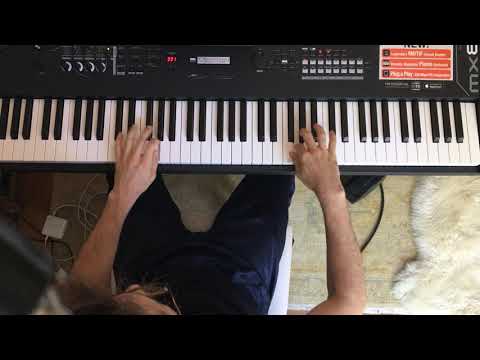
Piano Fingerings for Scales
- Greg's daily run through every fingering, including his admission that these are his own most-efficient fingerings, not a book's
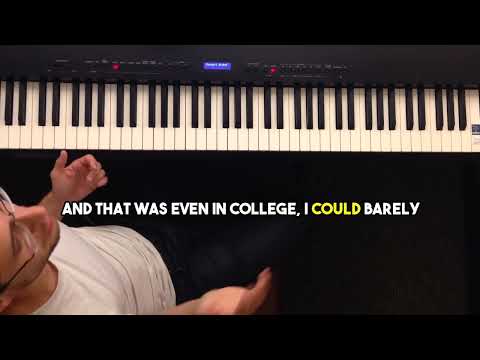
Practicing SLOW!!!
- 40 BPM in quarter notes until it is perfect, then speed up, and nothing else
At the piano
Set the bench so your elbow makes roughly a right angle at the keyboard and you can reach both ends without moving your back. Sit up, imagine a string pulling the back of your head toward the ceiling, chest out, chin slightly down, and then dial it back until it is comfortable rather than rigid.
Lift your hand, then place it very gently on the keys until the wrist is straight or a hair below level. Fingers rest, they do not clench. When you play a note, the motion comes through the finger and the weight comes through your arm and your back. The wrist dips slightly. Greg's exact words: "the motion is coming through your finger, but the weight is coming through your arm and through your back."
The hand shape Greg writes down in his own lesson materials is a loose tennis ball. Play on the fingertips, not the nails. Wrist level. Forearms parallel to the floor. And the thumb, when it goes under, "slides under through wrist flexibility, not brute force."
He got most of this from the source, and his notes from the 2012 lesson with Herbie Hancock are worth quoting straight because they are the only primary-source technique document in his archive:
"When doing scales, the hand should be in a natural position, and should not twist when the thumb crosses under. The most important thing, however, is that the fingers should be used, not the wrist, to press the keys. There is pressure from the arm, but the arm is not bouncing. The hand should look like it's just gliding, hovering over the keys, even while the thumb is crossing under."
Read that as four separate instructions and check yourself against each one. Natural hand position. No twist at the crossing. Fingers press, not the wrist. Arm supplies pressure, arm does not bounce.
Herbie also overruled a teacher on camera in those notes, and Greg kept the correction: do not center the wrist over the finger, just let the hand sit in its natural relaxed position and do not contort or twist it. You will find videos telling you the opposite. A2 is about why the field disagrees with itself; for now, use this one.
While you play the scale, watch the center of your wrist. It should not park over each note. It moves a little between notes, continuously, in the direction you are travelling. Right hand, C major, ascending, the thumb goes under for the fourth note. Left hand, C major, ascending, the third finger crosses over onto A, and Greg's shorthand is that three is always the crossing finger in the left-hand C scale.
One rule covers the crossings the chart does not spell out for you, and it has an exception you will need on the first day. Greg's rule: "whenever you're going from a black note to a white note, you want to cross your thumb under whenever possible. It just makes it easier." You asked whether that held in all directions and he said yes.
The exception is about what happens next, not about the two notes. "If you're just stopping there, just use your pinky, but if you're going up, then cross under." So the question to ask at a black-to-white step is whether the white note is a destination or a doorway. If the line ends there, the pinky takes it and the hand stays where it is. If the line continues upward, the thumb goes under, because the thumb landing there is what buys you the next five notes without moving the arm. Apply the same test at the top of every scale, where the last note is a stop, and in the middle of a four-octave run, where the same note is a doorway.
Two things you will do without noticing, because Greg watched you do both. You lift your arm and jerk on the thumb crossing. There is no need. One, two, three, wait, and just tuck the thumb under. And you rush past what your hands can execute. Slow down until every crossing is a decision you make rather than a thing that happens to you.
If you feel tension, stop, shake the hand out, and start again gently. This is not a suggestion. Sakai's clinical series of 200 injured professional pianists found that among the 70 who could name what they were practicing at onset, octaves and chords accounted for 74% of cases, and the average practice load before onset was near four hours a day. You are practicing 30 to 60 minutes. Stay uninjured and the rest of this course is available to you.
The Hesitation Test
Every "done when" in this lesson is graded by one criterion, and it is Greg's, written into his own lesson materials. "You've got it when your brain doesn't hesitate at all and it's completely natural."
That turns into a pass or fail you can apply yourself.
- A pass counts only if there was no moment of uncertainty anywhere in it. What fails the rep is a hesitation, so a pause where you had to decide which finger comes next fails even when every note was right.
- Five consecutive passing reps before a scale moves off the list.
- The five-second rule. If you cannot start a named scale within five seconds of hearing its name, it is not learned yet.
- The speed check comes later. Greg's written gate for a beginner is five clean reps at 80 BPM right hand, 72 hands together. Your tempo for these two weeks is still 40, because your problem is fingering under tension and not speed. Log the 80 and 72 numbers as the target you graduate to, not the one you chase now.
The four failure signs Greg lists, all of which you can hear or see without a teacher:
- An audible volume bump or a rhythmic hiccup exactly at the crossunder. In C major right hand that is at F. If a listener can locate your thumb, the rep fails.
- The thumb knuckle collapsing so the thumb strikes with the nail side.
- Practicing only ascending. Descending has its own crossings and they are the ones that go unpracticed.
- Speed. In his words, speed that amplifies errors writes errors into muscle memory.
The fingerings, all 12 major scales
Numbers are ascending, one octave, thumb is 1. Descending is the same numbers read backward.
Two things about running these past one octave, because the chart alone will mislead you. In the right hand the 5 is a top-note ending only, so in the middle of a four-octave run the octave note takes the first number of the pattern instead and you start the pattern again. In the left hand the first number is a bottom-note start only, so the octave note in the middle takes the last number of the pattern and you continue from the second number. The B flat, E flat, A flat, D flat and G flat right hands already print the continuing finger at both ends, so read those two numbers as the same note played twice, once as a start and once as a continuation.
KEY   RIGHT HAND            LEFT HAND
C     1 2 3 1 2 3 4 5       5 4 3 2 1 3 2 1
G     1 2 3 1 2 3 4 5       5 4 3 2 1 3 2 1
D     1 2 3 1 2 3 4 5       5 4 3 2 1 3 2 1
A     1 2 3 1 2 3 4 5       5 4 3 2 1 3 2 1
E     1 2 3 1 2 3 4 5       5 4 3 2 1 3 2 1
B     1 2 3 1 2 3 4 5       4 3 2 1 4 3 2 1   <- LH exception
F     1 2 3 4 1 2 3 4       5 4 3 2 1 3 2 1   <- RH exception
Bb    2 1 2 3 1 2 3 4       3 2 1 4 3 2 1 3
Eb    3 1 2 3 4 1 2 3       3 2 1 4 3 2 1 3
Ab    3 4 1 2 3 1 2 3       3 2 1 4 3 2 1 3
Db    2 3 1 2 3 4 1 2       3 2 1 4 3 2 1 3
Gb/F# 2 3 4 1 2 3 1 2       4 3 2 1 3 2 1 4
Read the chart as one rule with twelve consequences. The thumb only ever lands on a white key. Everything else is bookkeeping.
- Six keys share the plain right-hand shape 1-2-3, thumb under, 1-2-3-4-5. C, G, D, A, E and B. In all six the thumb takes the tonic and the fourth degree.
- F major is the right-hand exception. B flat sits on the fourth degree, so the groups reverse and you get four fingers then three. RH F is 1-2-3-4 up to B flat, then the thumb under onto C.
- B major is the left-hand exception. Starting on 4 instead of 5 lets the thumb land on E and B, both white, instead of stranding it on a black key. The B major right hand is the ordinary shape, thumb on B and E.
- The four flat keys B flat, E flat, A flat and D flat all share the identical left hand, 3-2-1-4-3-2-1-3. Learn it once, use it four times. Their right hands differ only in where the pattern starts, and in every one of the four the thumb takes C and F.
- G flat is its own animal in both hands, because five of its seven notes are black. The thumb takes the only two white keys in the scale, F and C flat, which is the key you know as B. Spell it F sharp instead and nothing about the hands changes.
If you would rather carry one fact per key than eight numbers, carry the thumb notes. Right hand, the thumb takes C and F in every one of C, F, B flat, E flat, A flat and D flat; G and C in G; D and G in D; A and D in A; E and A in E; B and E in B; and F and C flat in G flat. Left hand, the thumb takes the fifth degree and the tonic in the sharp keys, so G and C in C, D and G in G, A and D in D, E and A in A, B and E in E, E and B in B, C and F in F, D and A in B flat, G and D in E flat, C and G in A flat, F and C in D flat, F and C flat in G flat. Everything else fills in around them.
Greg gives one personal variant worth knowing. Teaching A major in the left hand at [15:01] of How to play all modes on the piano, he crosses the fourth finger over after E rather than the third, so that the thumb is not left sitting where the next step is a black key. His stated principle is that "any time that you want to go upwards to a black note from a white note it makes sense to cross over," and he says on camera that other techniques exist. The chart fingering already keeps the thumb off the black keys in A, so use the chart, and keep his rule as the tool for deriving anything the chart does not cover.
Exercises
1. C major, one hand, one octave, no metronome
Do. Right hand alone, ascending and descending, slowly enough that you can name the finger before you use it. Watch the wrist center drift a little between notes. Then the left hand alone.
Done when: five consecutive Hesitation Test passes in each hand, and the crossings at F and C are inaudible. Record it on your phone and listen back with your eyes closed. If you can hear where the thumb went, the rep failed.
2. C major, two octaves, hands separate, at 40 BPM
Do. Pro Metronome at 40, one note per click. Right hand two octaves up and back down without stopping. Then the left hand. If tension appears anywhere, stop mid-scale, shake the hand out, and restart from the beginning of that octave.
Done when: five consecutive Hesitation Test passes in each hand, two octaves up and down at 40, with no shake-outs and no bump at any crossing.
3. Hands together, C major, two octaves
Do. Same tempo, both hands in parallel motion two octaves apart to start, then in the same octave span. The hands cross their thumbs at different moments in C major, and that asymmetry is the actual work. Do not fix it by watching your hands. Fix it by slowing down until both crossings are deliberate.
Done when: five consecutive Hesitation Test passes hands together, two octaves up and down at 40, with no gap or accent where either thumb passes.
4. The circle order, hands separate
Do. Take the keys in the order Greg runs them: C, F, B flat, E flat, A flat, D flat, G flat, B, E, A, D, G, and back to C. One new key every day or two. Say the fingering out loud before you play it. Write it on paper before you check the chart.
Done when: your own written fingering chart for all twelve matches the chart above, and every scale passes the Hesitation Test five times hands separate, two octaves, at 40. Apply the five-second rule as you go: name a key at random and start playing it inside five seconds.
5. All twelve, hands together
Do. The same circle order, hands together, two octaves, 40 BPM, one pass each with no repeats and no restarts. Roughly ten minutes.
Done when: you can play the whole circle in one sitting with zero hesitations. This is the checkpoint for the lesson.
5b. The four-octave extension, one key at a time
Do. Only for keys that have already passed exercise 5 hands together at two octaves. Take that one key out to four octaves, hands separate first, then together, same 40 BPM, no other key added until this one passes. The new work is not the fingering, which repeats, but the middle-of-the-run reading of the chart described above, where the right-hand 5 and the left-hand first number stop being endings and become continuations.
Done when: at least C, F and G run four octaves hands together at 40 with five Hesitation Test passes each, and you can say which number in the pattern replaces the top or bottom finger mid-run.
6. The rhythmic ladder, one key only
Do. Keep the metronome at 40 and change what you put between the clicks: quarters, eighths, eighth triplets, sixteenths. Greg goes on to sixteenth triplets and thirty-seconds; stop at sixteenths for now. The tempo never changes.
Done when: the subdivision changes exactly on a click every time, in three different keys.
Checkpoint
Before A2, demonstrate on video, one take each:
- All twelve major scales, two octaves, hands together, at 40 BPM, five Hesitation Test passes each, even tone from bottom to top.
- Three keys extended to four octaves, hands together, at the same tempo and the same standard.
- The five-second rule, tested cold: someone names six keys at random and you start each inside five seconds.
- C major hands together at 40 with the metronome muted for four bars in the middle, landing in the right place when it returns.
- Your own handwritten fingering chart for all twelve keys, matching the chart above.
- Two minutes of playing with no tension event, or an honest count of how many shake-outs it took.
- Say out loud, without looking, the black-to-white thumb rule, its stopping-versus-continuing exception, and the keys where the standard fingering breaks the plain pattern.
Read
- Greg's own written lesson materials. The fingering, the hand shape and the Hesitation Test in this lesson come from his Poseidon lesson companion (https://poseidon.gregspero.com), the roughly forty-page companion Greg wrote for his first private lesson with Poseidon Ho on 6 June 2026. It is the most complete written record of how he teaches this. The related lesson pages are live at poseidon.gregspero.com.
- Greg's 2012 Herbie Hancock lesson notes, unpublished. Two pages, written the same week, and the only primary-source technique document in his archive. Read the hand-mechanics paragraph quoted above in full context. Hancock's other instruction there matters for A3. Practice exercises that let the fingers play any notes at any time, without limiting yourself based on black keys and white keys. That is the argument for all twelve keys as a motor problem rather than a theory problem.
- The Weekly Piano fingering chart, linked in the description of Piano scales fingerings. Print it. It is the reference for this lesson and for A3.
- György Sándor, On Piano Playing, chapter 5. Read only the scale-and-arpeggio chapter for now, for one idea, the lateral shift of the whole arm at the thumb passage. Sándor calls the thumb crossing a shifting problem rather than a finger problem, which is the same correction Greg gave you about not lifting the arm. Archive record
- Sakai 2002, 'Hand Pain Attributed to Overuse among Professional Pianists.' Four pages. Read it now, before you have a reason to. DOI
- Source course, Lesson 1. The keyboard as the harmonic reference tool, and why the physical work comes before anything gets named.